
Creating merge fields
Merge fields are the same as the fields created in the list. You can read this guide to learn how to create fields in your list.
A merge field inserts a value only if data is available in the corresponding field on the form. If you want to ensure that all forms display content, you can specify a fallback text.
One example is the first name. If a contact does not have a first name on file, you can specify “Customer” as the fallback text. The email will then display “Dear Customer” instead of a blank field that says “Dear ”.
You can specify a fallback text under “Edit List”. Locate the field you want and enter the value you want to display in the email in the “Fallback” field.
Merge fields in an email campaign
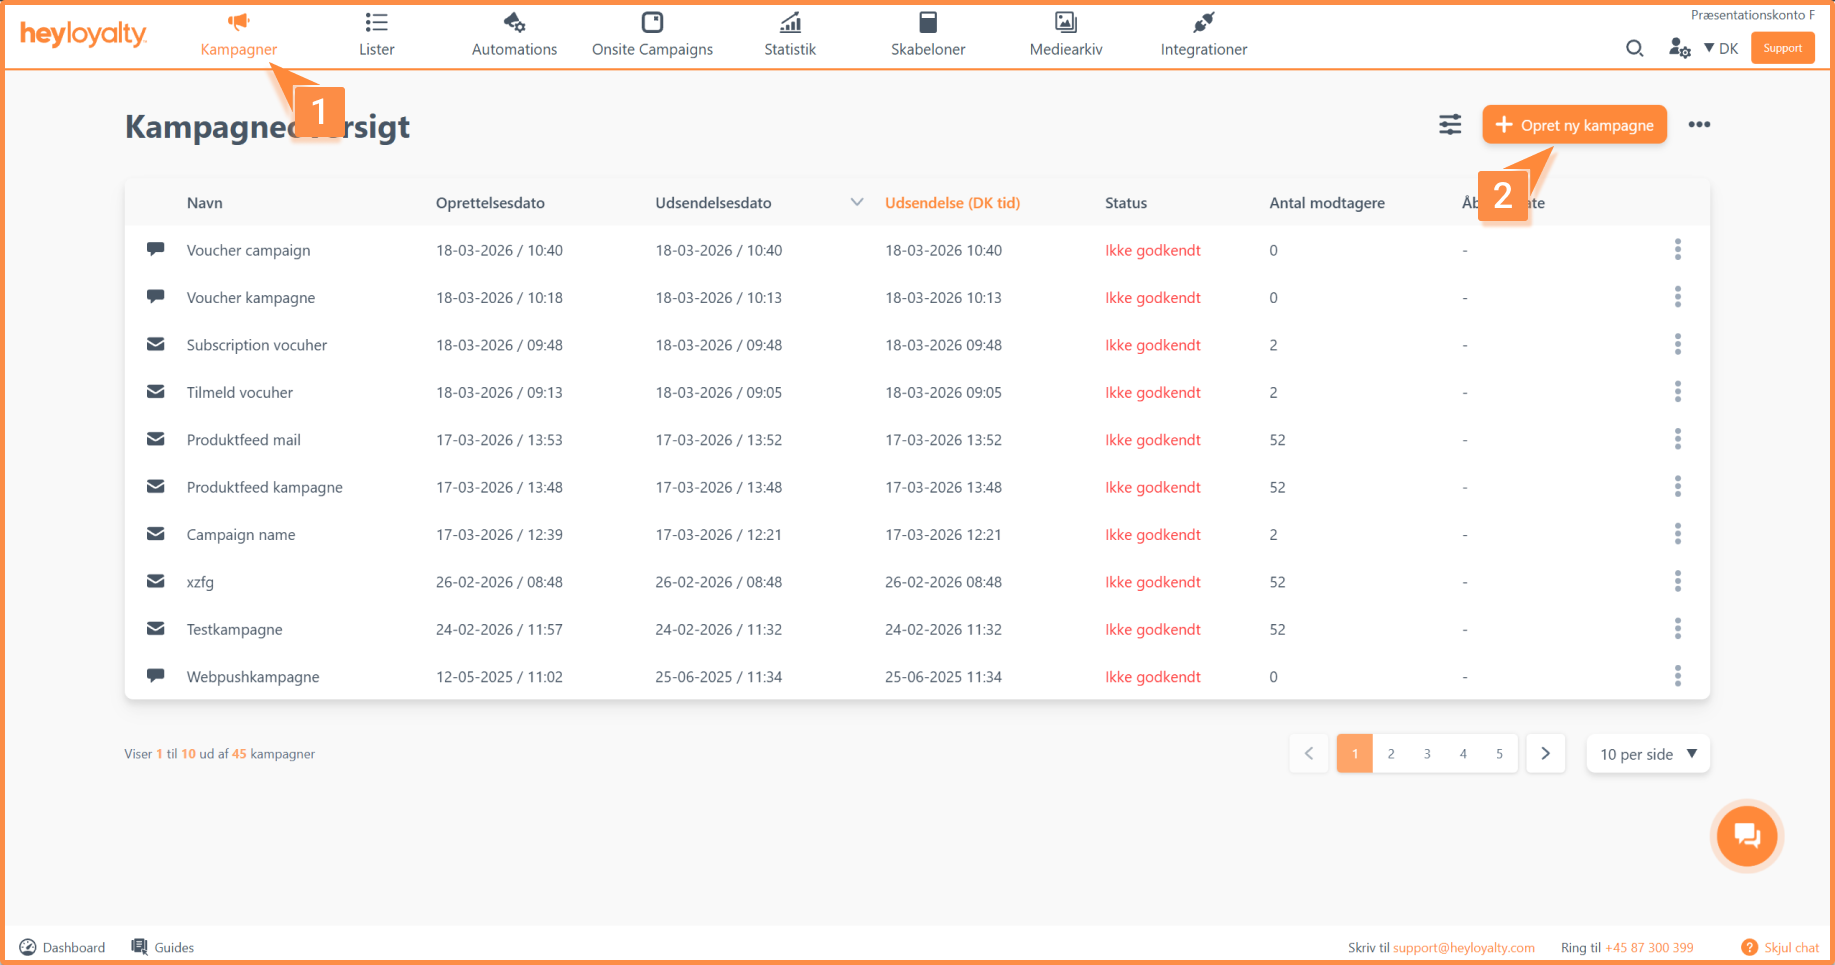
Click Campaigns → Create new campaign
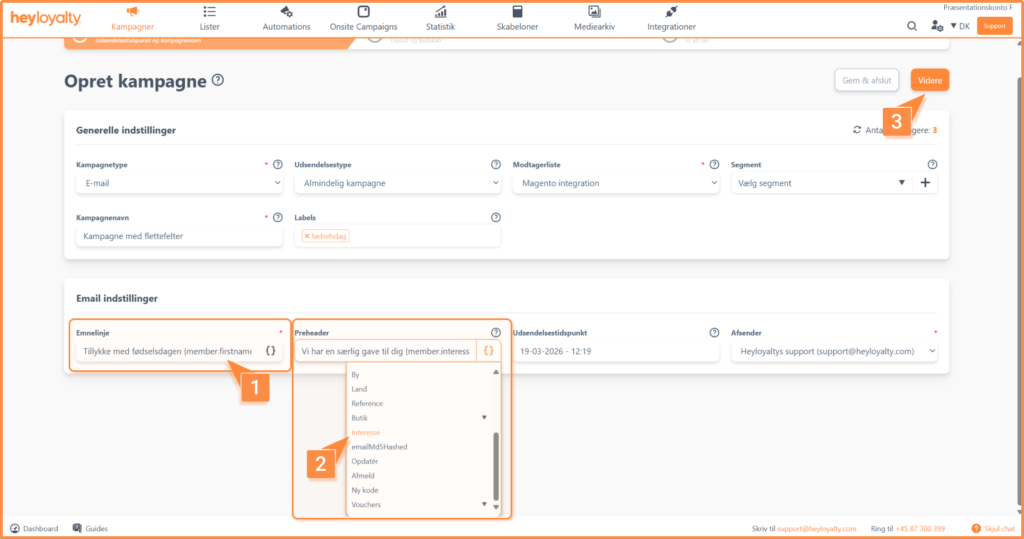
Fill in the information.
You can use merge fields in both the subject line and preheader by clicking { } and selecting the merge field you want to insert. Click Next.
Design your email.
When you want to insert a merge field, you must insert it into a text block. Click { } → Member → Select the merge field you want to insert.
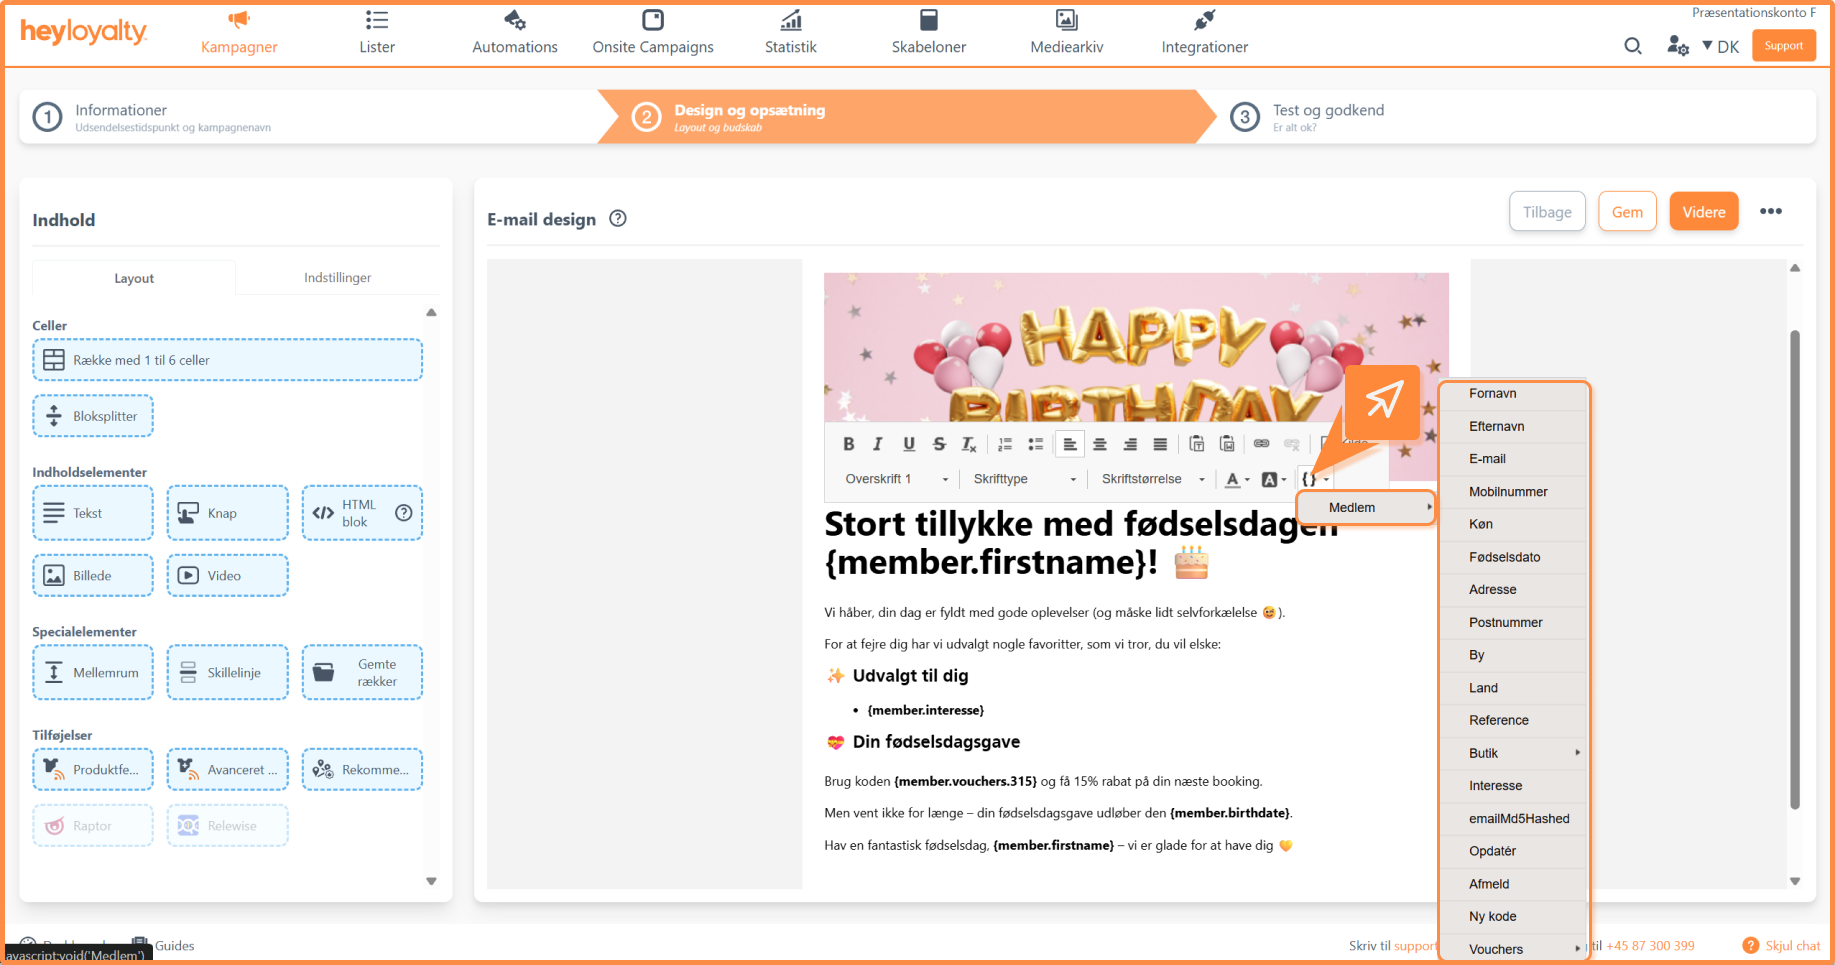
Above, “Member → First Name” has been inserted on the first line and “Member → Interest” on the second line. Once you’ve inserted a merge field, you’ll see the merge field in the email, but not the actual data from a specific contact. However, you can see that in Step 3 – Test and Approve.
Once your campaign is designed, click Continue.
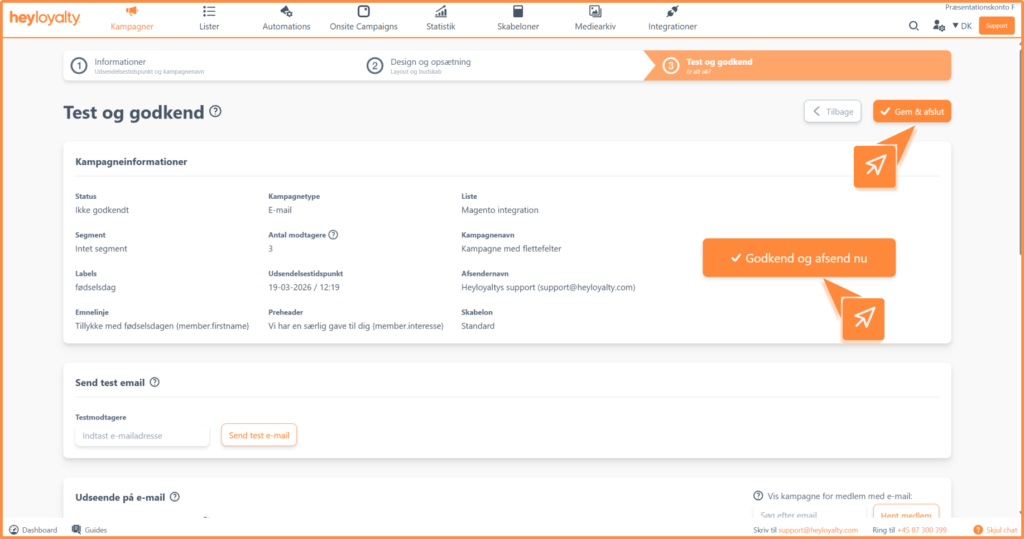
Double-check that everything is as it should be in the Campaign information.
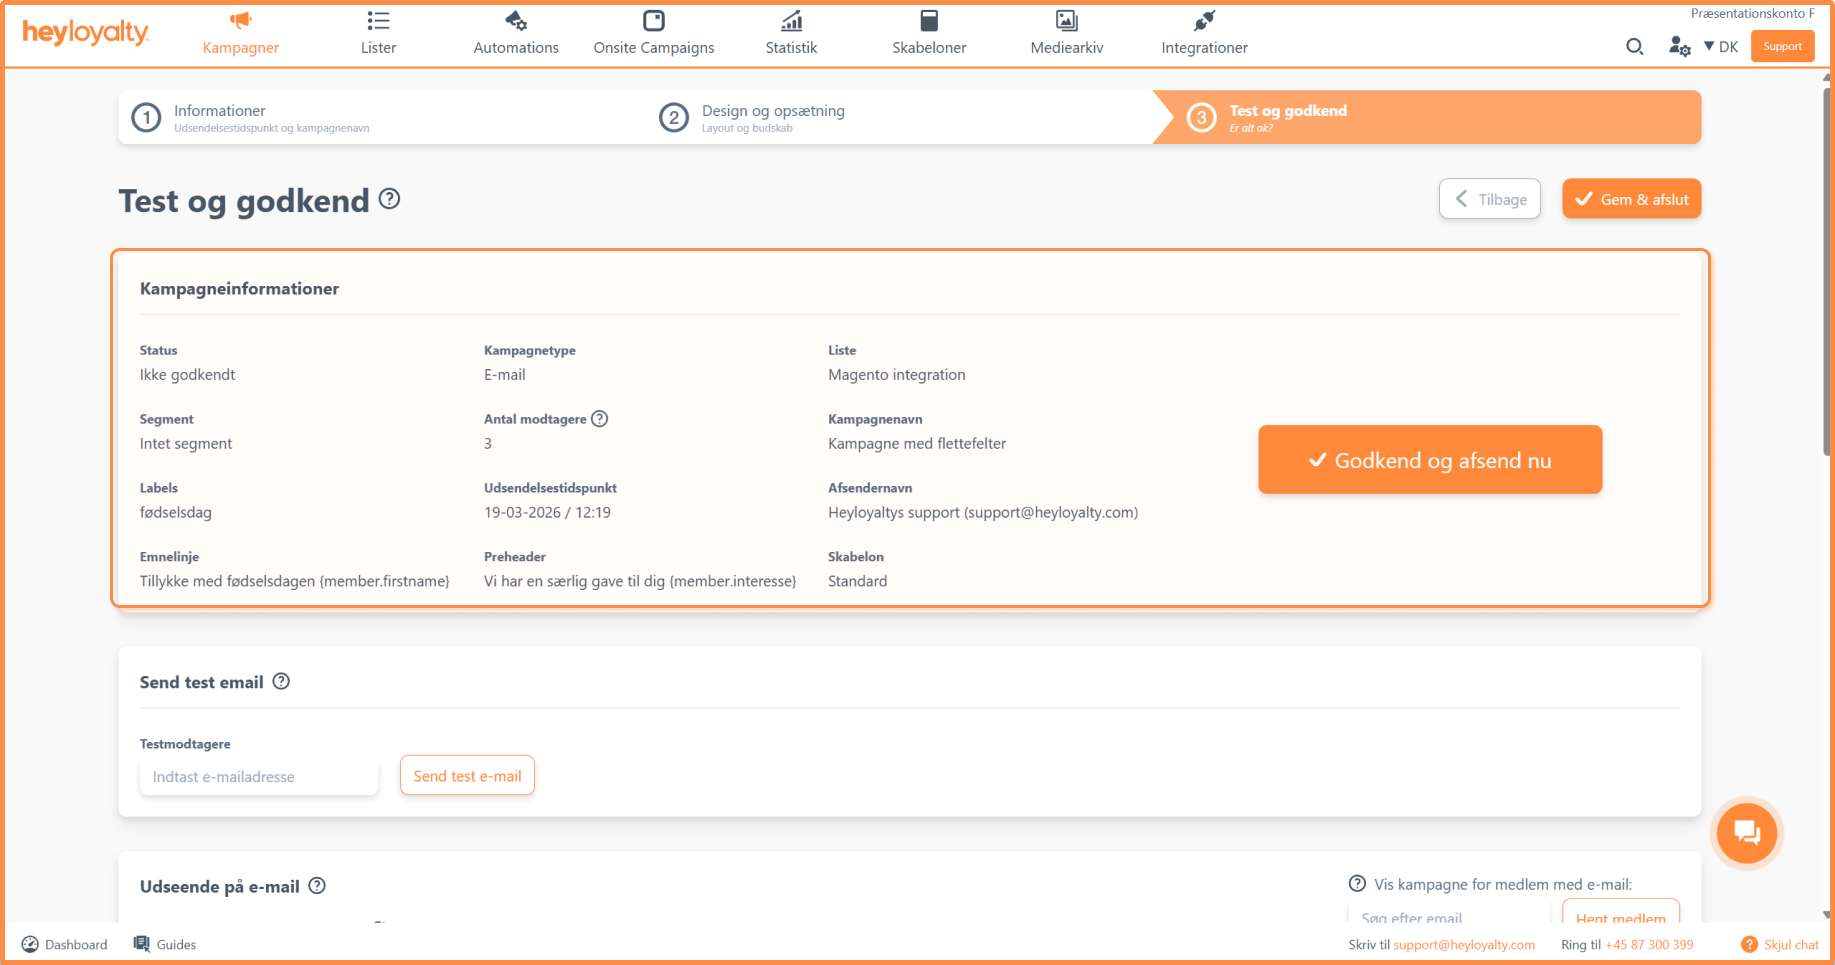
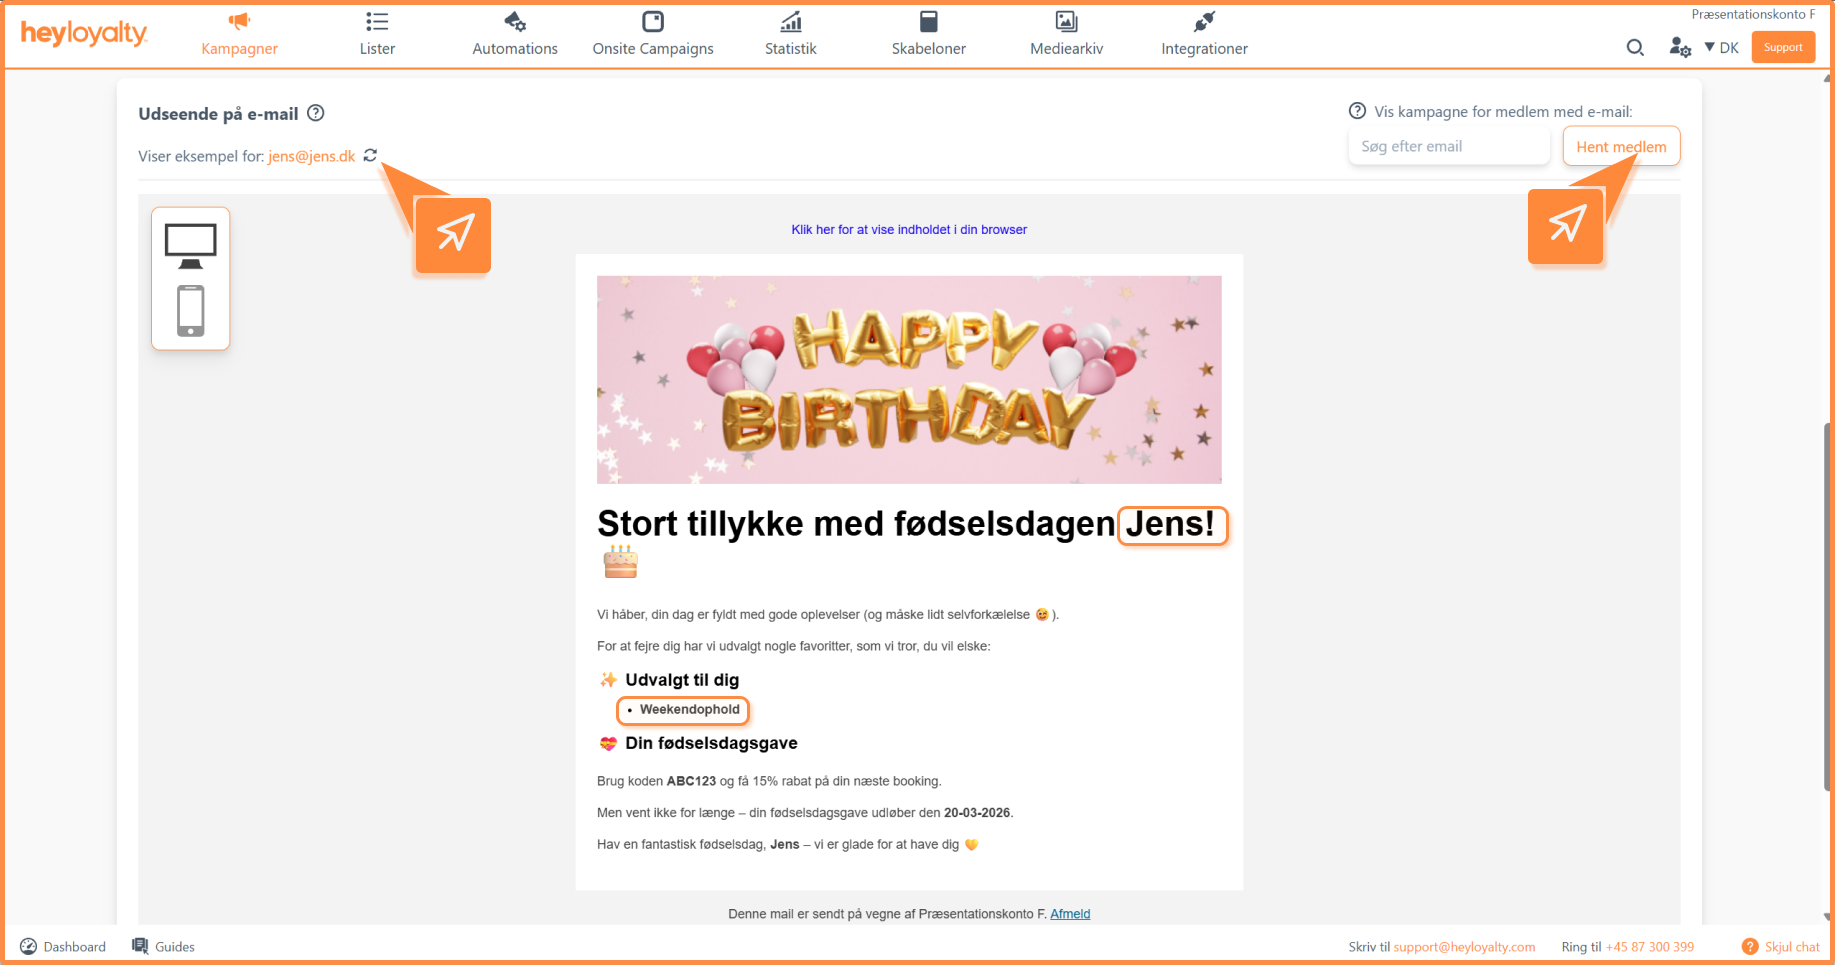
Scroll down to see the preview of your email, where you can check your merge fields.
You can now see how {member.firstname} has changed to Jane and {member.Interesse} has changed to Weekend stay.
Above the email preview, you can change which contact the campaign previews. In the top-left corner, you’ll see “Preview for: jens@jens.dk”. Click 🗘 to have Heyloyalty select a new random contact from the list. Alternatively, you can enter the email address of a specific contact in the “Show campaign to member with email:” field. Here, you can test with a contact you know has specific information in a given merge field – for example, one of your own test contacts, so you can double-check the data in the merge fields.
Click Confirm and send now, Approve Campaign or Save and exit to send, approve or save the campaign.

If you need information or help that you cannot find here on the guide site, you are always welcome to contact our support!
support@heyloyalty.com